

 FOLLOW ON INSTAGRAM👇🏻
HOW TO PAIR SHIZUKU
2. Using Wireless Debugging (Android 11+)
1. Enable Developer Options: Go to Settings > About phone....
2. Enable Wireless Debugging: Go to Settings > Developer options....
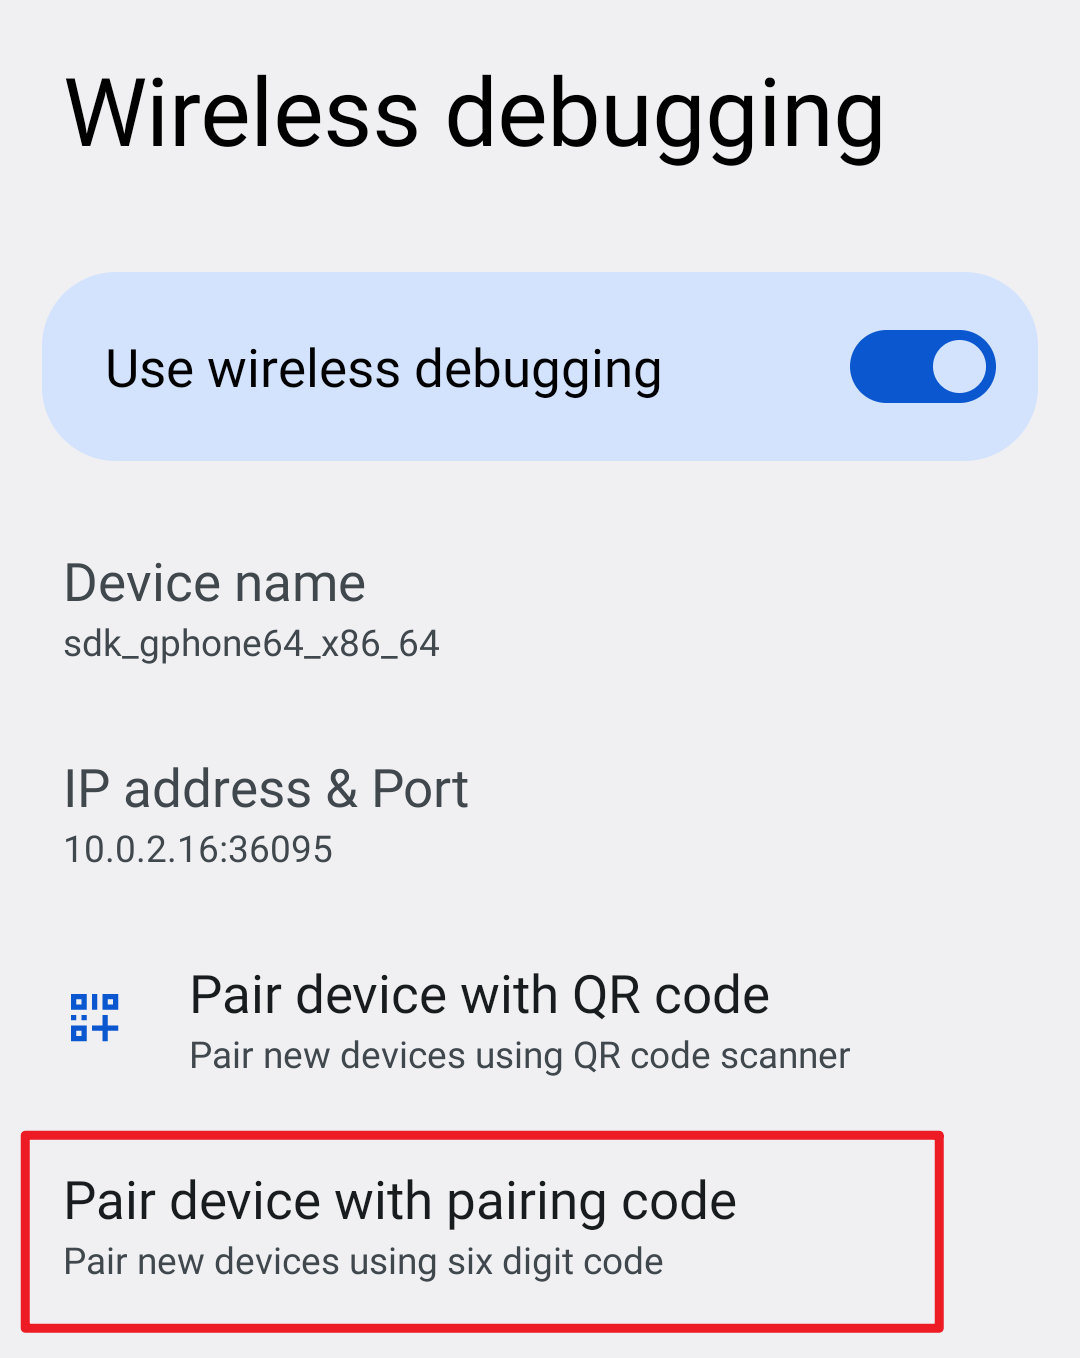
3. Pair Device for Wireless Debugging: Open Developer options > Wireless debugging > Pair device with pairing code....
#User manual
- Start Shizuku
- FAQ
- Start via wireless debugging: keeps showing "Searching for pairing service"
- Start via wireless debugging: immediately fail after tapping "Enter pairing code"
- Start via wireless debugging/Start by connecting to a computer: the permission of adb is limited
- Start via wireless debugging/Start by connecting to a computer: Shizuku randomly stops
- Start via root: cannot start on boot
#Start Shizuku
Shizuku supports startup in the following three ways.
If you are using GrapheneOS
System settings - "Security" - "Secure app spawning" may need to be disabled.
#Start with root
For rooted devices, just start directly.
#Start via wireless debugging
Starting with wireless debugging works on Android 11 or above. This startup method does not require a connection to a computer. Due to system limitations, the startup steps need to be performed again after each reboot.
#Enable Wireless debugging
- Search the web for how to enable "Developer options" for your device model
- Enable "Developer options" and "USB Debugging"
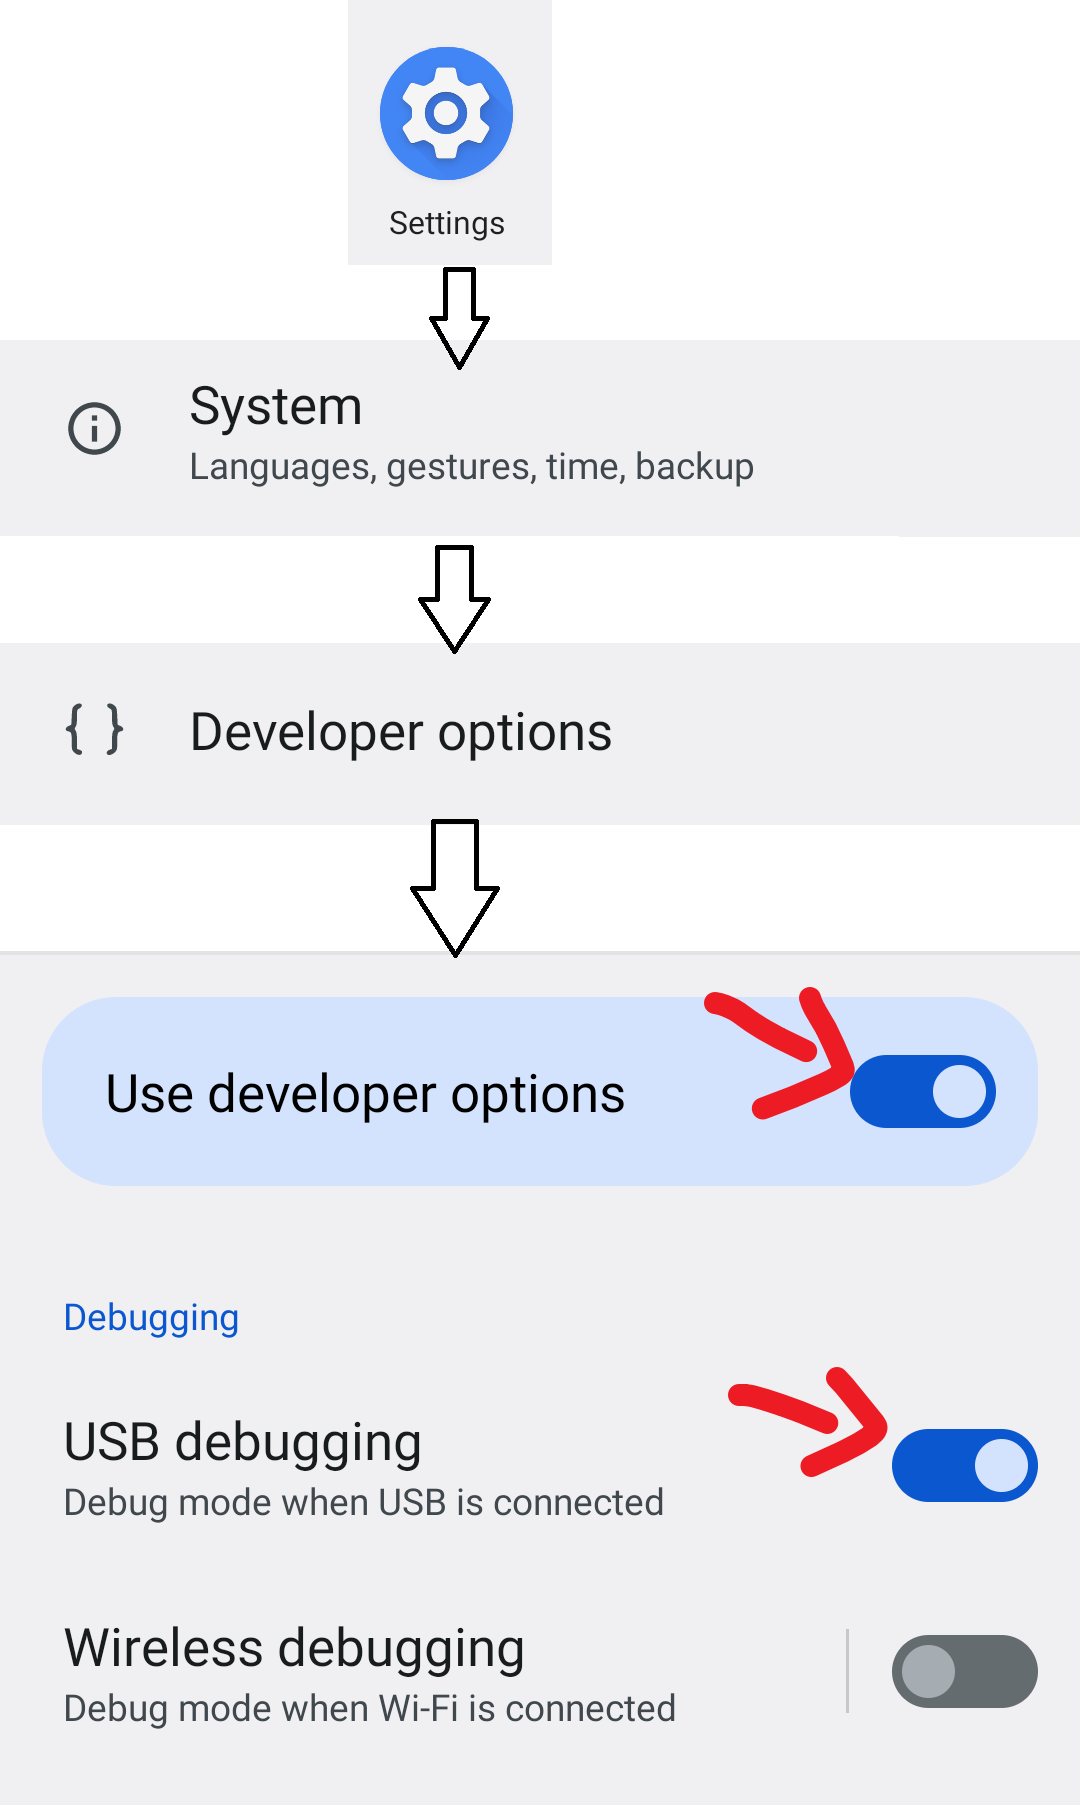
- Enter "Wireless debugging"
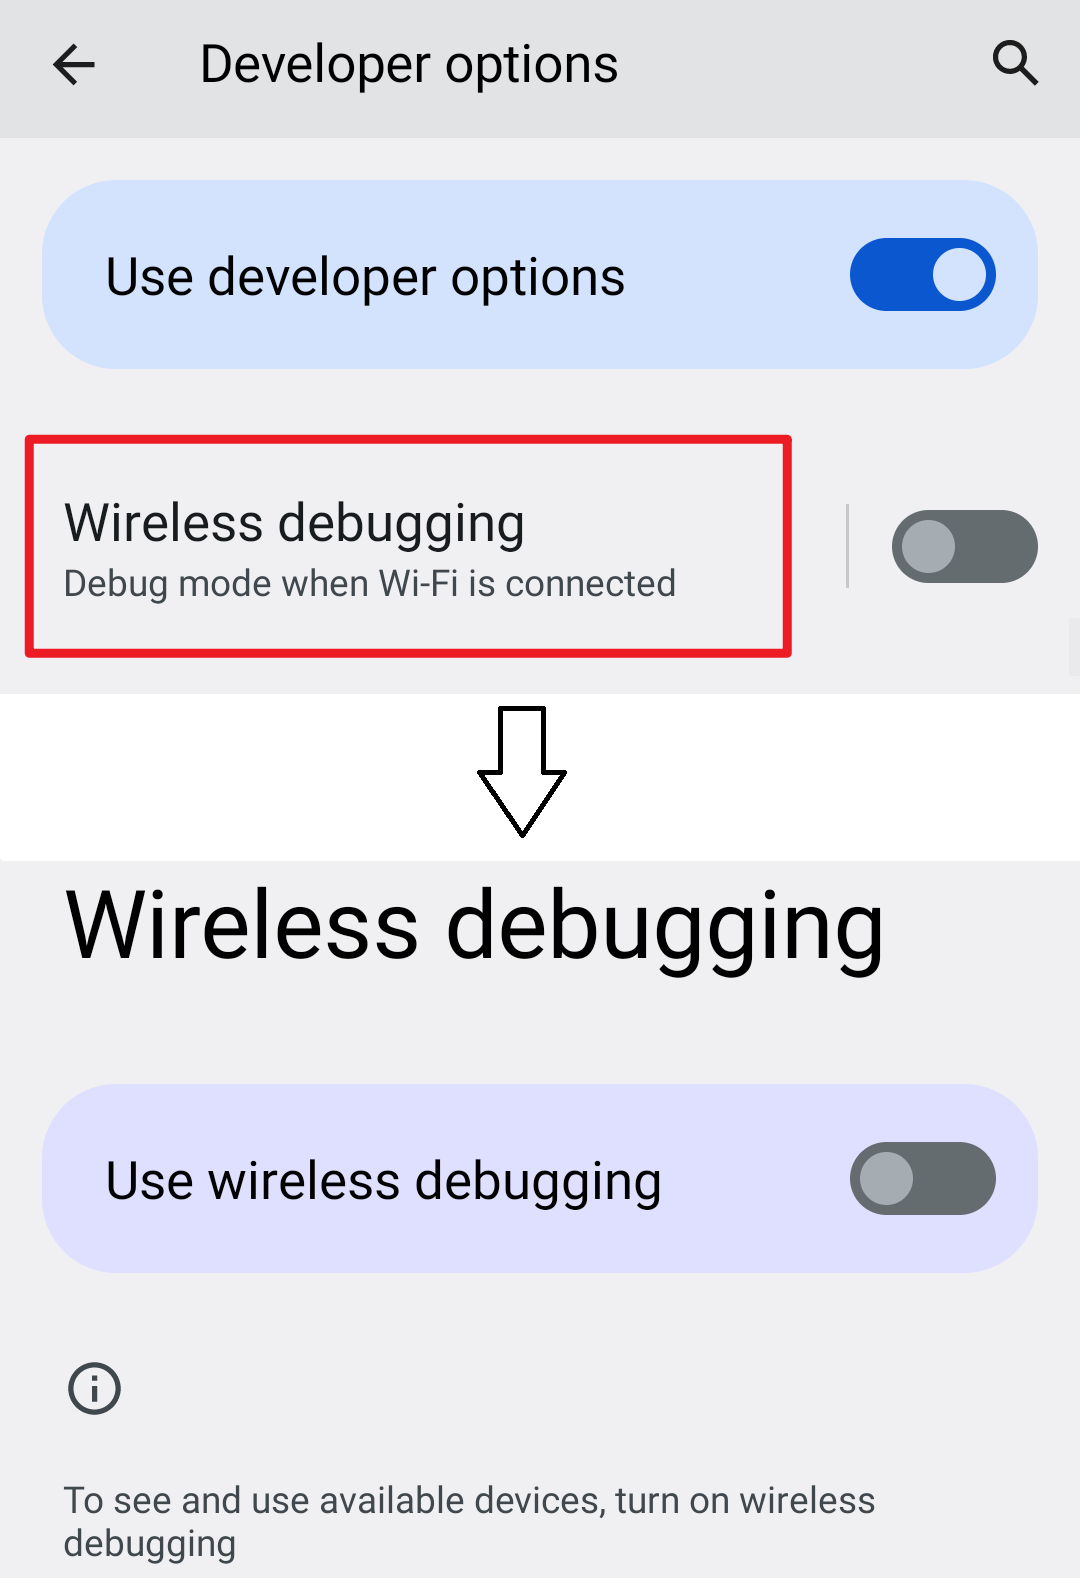
- Enable "Wireless debugging"
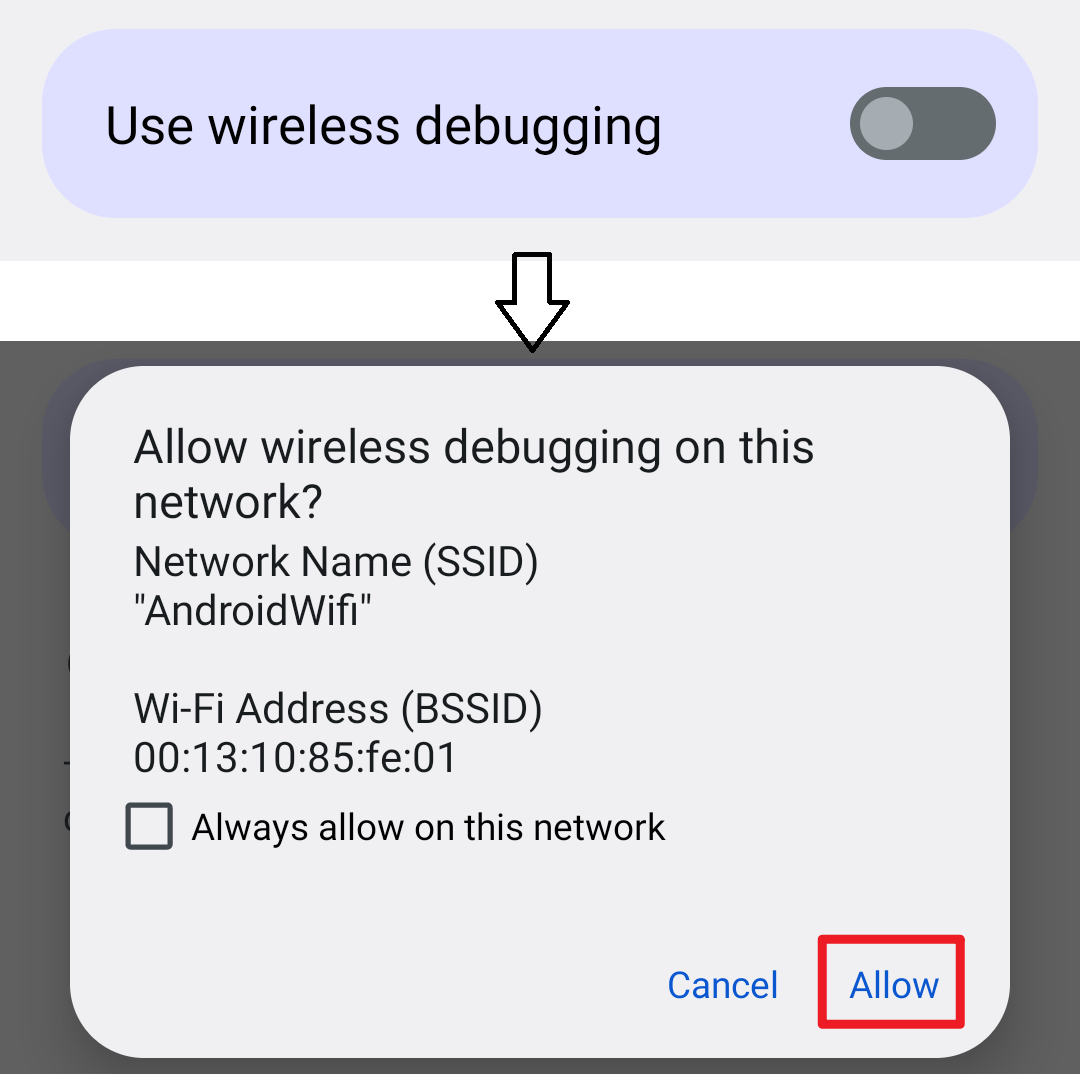
#Pairing (only needs once)
- Start pairing in Shizuku
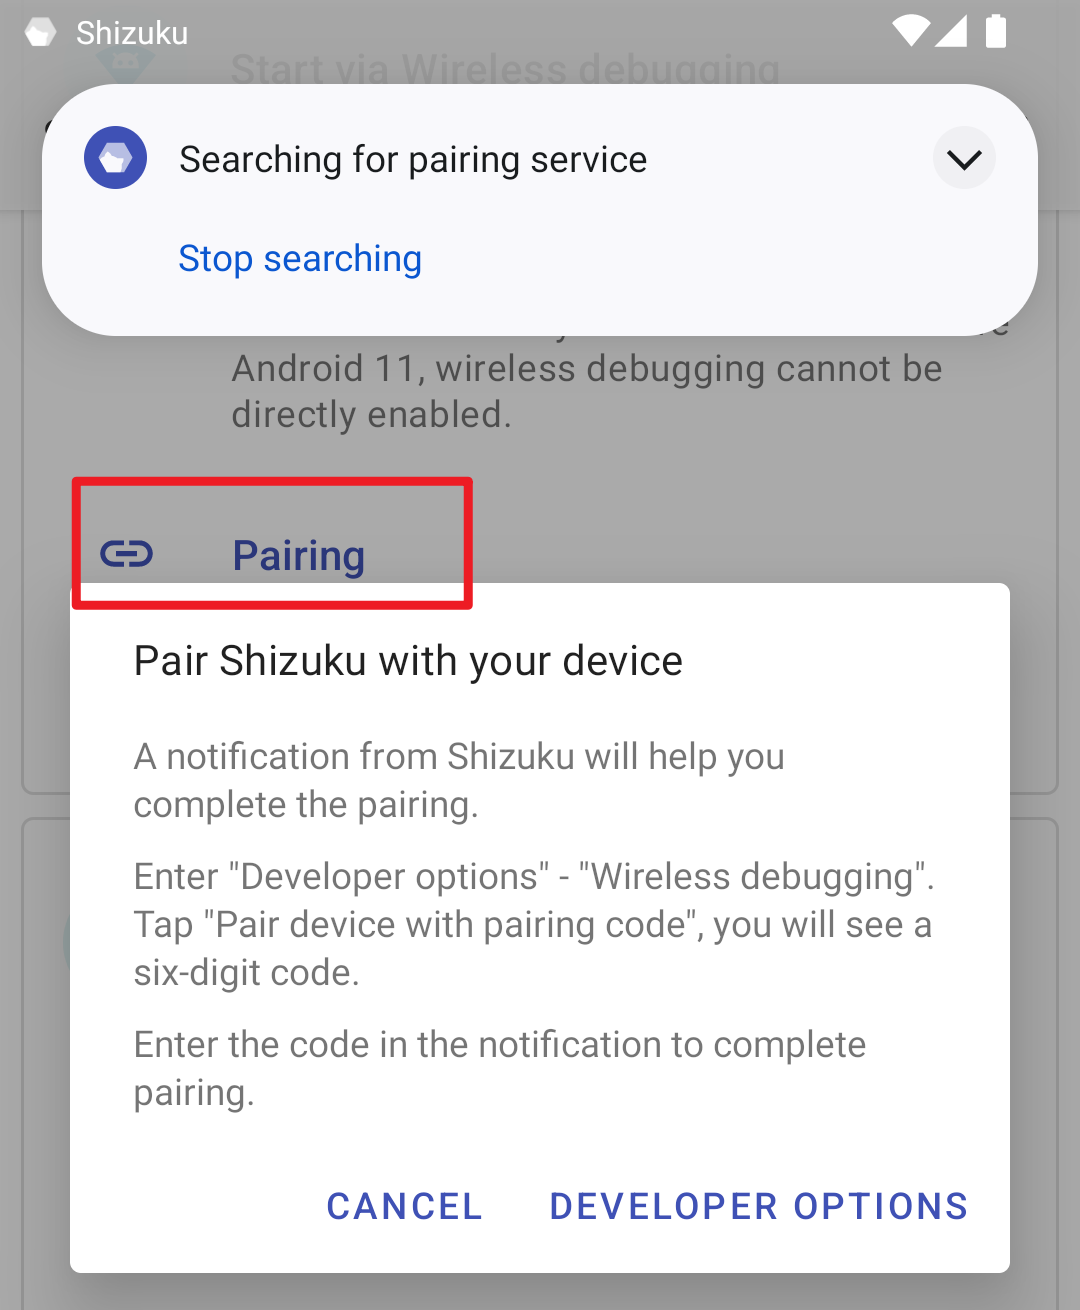
- Enable Wireless debugging
- Tap "Pair device with pairing code" in "Wireless debugging"
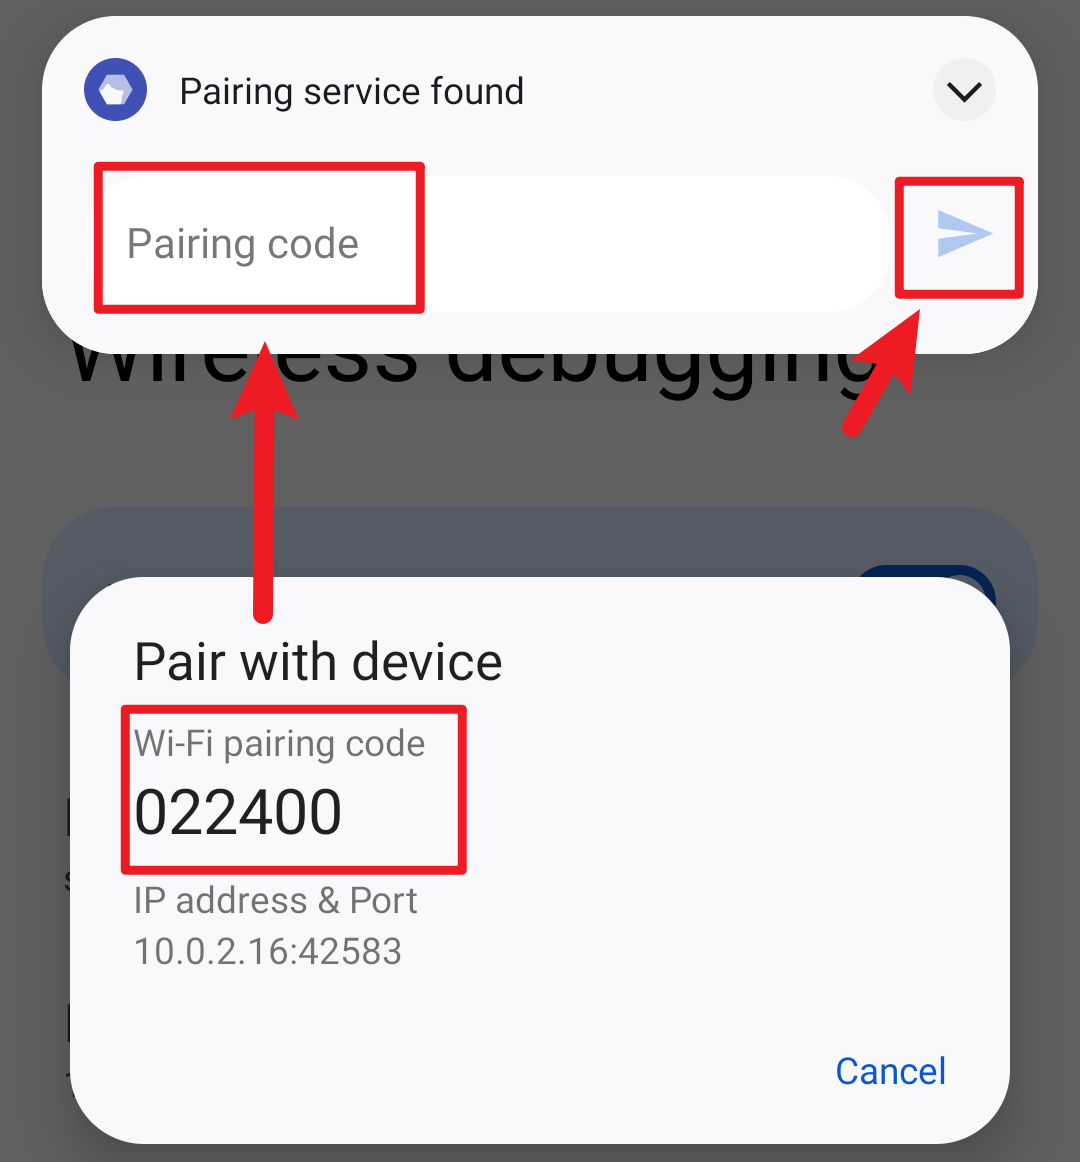
- Enter pairing code in Shizuku's notificaiton
#Start Shizuku
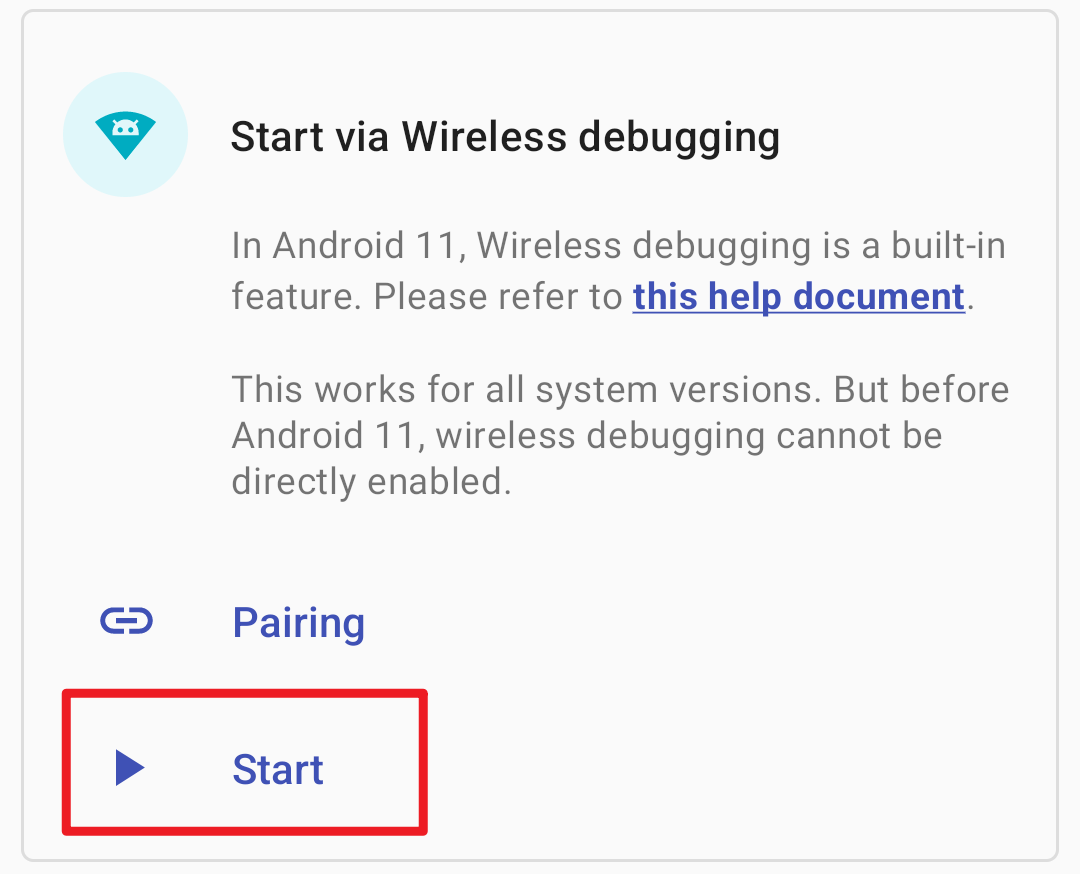
If it does not start, try disabling and enabling wireless debugging



No comments:
Post a Comment